How to Post a Live Photo on Instagram Story or Post
Mastering Live Photos: A Step-by-Step Guide to Posting on Instagram
In the ever-evolving world of social media, Instagram has emerged as a platform where visuals speak louder than words. One feature that has caught the attention of millions worldwide is the ability to post a Live Photo on Instagram Story or Post. This feature allows users to bring their photos to life, adding a dynamic element to their Instagram presence.
Live Photos, a feature initially introduced by Apple, captures 1.5 seconds of motion before and after the picture is taken, creating a short video clip rather than a static image. This feature has been embraced by Instagram, allowing users to share these moments of motion, adding depth and context to their posts and stories.
The ability to post a Live Photo on Instagram Story or Post can transform your Instagram experience, making your posts more engaging and interactive. Whether it’s a fleeting moment of laughter at a family dinner, a stunning sunset, or a memorable event, Live Photos enable you to share these experiences in a more immersive way.
In this article, we will guide you through the process of posting a Live Photo on Instagram, whether it’s on your story or as a post. We will provide step-by-step instructions, tips, and tricks to help you make the most of this exciting feature. So, let’s dive in and bring your Instagram posts to life!
What is a Live Photo?
A Live Photo is a unique feature that was first introduced by Apple for its devices. It’s not just a regular photo, but a combination of a still image and a short video clip. When you capture a Live Photo, your device records 1.5 seconds of motion before and after the picture is taken. This results in a mini video that brings your photo to life, capturing amazing reactions or moments you might have missed.
To take a Live Photo, you need to open the Camera app on your iPhone. Look for the concentric circles icon at the top of the screen – this is the Live Photos button. If the icon has a line through it, that means the Live Photos feature is disabled. To enable it, simply tap on the icon. Once enabled, you can press the Shutter button to capture a Live Photo.
Live Photos are a fantastic way to add a dynamic element to your Instagram posts and stories. They can capture the ambiance of a scene, the emotion of a moment, or the surprise in an unexpected event. And the best part is, you can share these Live Photos on Instagram.
Now, we will guide you on how to post a Live Photo on your Instagram Story or as a Post. Whether you’re new to Instagram or a seasoned user, our step-by-step instructions will help you navigate the process with ease. So, let’s move on to the next section where we will discuss how to prepare your Live Photo for Instagram.
Preparing Your Live Photo for Instagram
Before you can post a Live Photo on Instagram, you need to prepare it. This involves selecting the Live Photo you want to use and converting it into a format that Instagram supports.
To start, open the Photos app on your device and select the Live Photo you want to post. Once you’ve chosen your Live Photo, you’ll need to convert it into a video. To do this, swipe upwards on the Live Photo and choose “Save as Video”. If you don’t see this option, tap on the Share icon and select “Save as Video”.
Now that you have your video, you’re ready to post it on Instagram. But before you do, you might want to edit it to make sure it looks its best. Instagram offers a variety of editing tools that you can use to enhance your video. You can add filters, trim the video, and even add music.
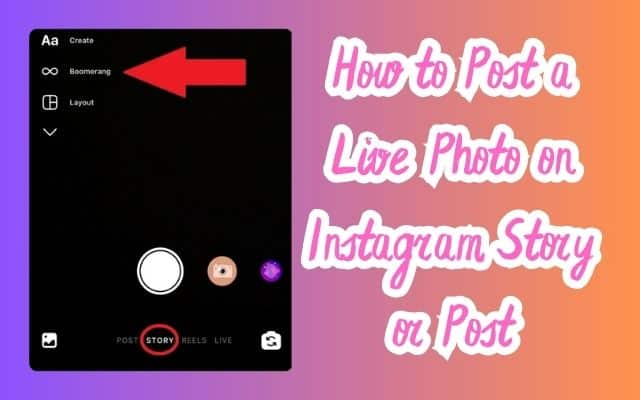
If you’re posting the Live Photo on your Instagram Story, you have the option to use the Boomerang feature. This feature turns your Live Photo into a short video that loops back and forth. To use this feature, open Instagram, tap the camera icon to start a new Story, and then choose the Live Photo from your camera roll.
Whether you’re posting a Live Photo on your Instagram Story or as a Post, preparing your Live Photo properly will ensure that it looks great and captures the attention of your followers.
Posting a Live Photo on Instagram Story
Posting a Live Photo on your Instagram Story is a great way to share dynamic, engaging content with your followers. Here’s a step-by-step guide on how to do it:
- Open the Instagram App: Launch the Instagram app on your device.
- Start a New Story: Tap on the camera icon in the top left corner or swipe right from anywhere in Feed to start a new story.
- Select a Live Photo: Swipe up from the bottom of the screen to access your photo library. Choose the Live Photo you want to post.
- Add Boomerang Effect: Once your Live Photo is loaded in the editor, tap on the Boomerang icon at the top to add the classic Boomerang effect. This step is necessary, otherwise, the Live Photo will be added as a still picture.
- Edit Your Story: Now, you can add text, stickers, or write on your story. You can also use other effects like Slow-mo, Echo, or Duo from the list at the bottom.
- Post Your Story: Finally, tap on the ‘Your Story’ button at the bottom to post the Live Photo on your Instagram story.
Congratulations! You have successfully published a Live Photo on your Instagram story. The story will say ‘Boomerang by Instagram’ at the top.
Remember, Live Photos can only be posted to your Instagram Story if they were taken in the last 24 hours. However, there’s a workaround for this: you can screenshot the Live Photo or briefly edit it in your Photos app to reset the timestamp.
Now, we will discuss how to post a Live Photo on your Instagram feed. Stay tuned!
Posting a Live Photo on Instagram Post
Posting a Live Photo on your Instagram feed allows you to share dynamic moments with all your followers. Here’s a step-by-step guide on how to do it:
- Select a Live Photo: Open the Photos app on your device and select the Live Photo you want to post.
- Convert to Video: Swipe upwards on the Live Photo and choose “Save as Video”. This will convert your Live Photo into a video format that can be posted on Instagram.
- Open Instagram: Launch the Instagram app on your device.
- Start a New Post: Tap the plus sign in the app’s bottom menu.
- Select Your Video: Choose the video you saved from your photo library. The library will appear when you hit the plus sign, allowing you to edit your photo as you see fit.
- Edit Your Post: Instagram offers a variety of editing tools that you can use to enhance your video. You can add filters, trim the video, and even add music.
- Post Your Live Photo: Once you’re happy with your post, tap “Next” in the top right, add your caption, and hit “Share”.
Congratulations! You have successfully posted a Live Photo on your Instagram feed. Your followers can now enjoy this dynamic content, and you can use this feature to make your Instagram feed more engaging and interactive.
Engaging Your Audience with Live Photos (200 words)
Engaging your audience is crucial when posting Live Photos on Instagram. Here are some tips to help you do that:
- Promote Your Live Photo: Use Instagram Stories to create anticipation for your Live Photo. You can also use the countdown sticker to let your audience know when you plan on posting the Live Photo.
- Engage with Your Audience: When you post a Live Photo, make sure to engage with your audience. Answer their questions in the comments, take calls, and use the Live Room to engage in conversation.
- Use Interactive Features: Instagram offers several interactive features that can make your Live Photos more engaging. For example, you can add a title to your Live Photo, add a guest to your live video, or send your live video link directly to a follower while broadcasting.
By following these tips, you can successfully engage your audience with Live Photos on Instagram.
FAQ
Can you post live photos on Instagram story?
Yes, you can post Live Photos on your Instagram story. You need to select the Live Photo from your camera roll and add it to your story. Remember to press and hold the photo in the story editor to activate the Live Photo.
How do I post my live on Instagram?
To post a live video on Instagram, tap the camera icon in the top left of the screen or swipe right from anywhere in the feed. Then, tap ‘Live’ at the bottom of the screen and then tap ‘Start Live Video’.
How do I post a live photo video?
To post a Live Photo as a video, you need to convert the Live Photo into a video format first. You can do this by selecting the Live Photo in your Photos app, swiping up, and choosing “Save as Video”. Then, you can post this video on Instagram like any other video.
How do you post a bounce picture on Instagram?
To post a bounce picture on Instagram, you need to convert your Live Photo into a Boomerang. You can do this by selecting the Live Photo while creating a new story, and then swiping up to reveal the ‘Boomerang’ option.
Can you post a live photo as a story?
Yes, you can post a Live Photo as an Instagram story. Just select the Live Photo from your camera roll and add it to your story. Make sure to press and hold the photo in the story editor to activate the Live Photo.
Can you post a live to your story?
Yes, after you’ve ended your live video on Instagram, you can tap “Share to Story” at the bottom of the screen to let your followers replay it for 24 hours.
Why can’t I post my live on Instagram?
If you’re having trouble posting your live video on Instagram, it could be due to several reasons such as a weak internet connection, outdated app version, or device limitations. Make sure your app is updated to the latest version and you have a strong internet connection.
Can you put a live link in an Instagram post?
Instagram doesn’t allow clickable links in post captions. However, you can add a clickable link to your Instagram bio, or if you have a business account with over 10,000 followers, you can add links to your Instagram Stories.
Conclusion
By following the steps outlined in this article, you can successfully post a Live Photo on Instagram, whether it’s on your story or as a post. Remember, the key to a successful post is preparation. Select the right Live Photo, convert it into a video format, use a third-party app to convert it to a GIF if necessary, and finally, post it on Instagram.
Live Photos are a fantastic way to add a dynamic element to your Instagram posts and stories. They can capture the ambiance of a scene, the emotion of a moment, or the surprise in an unexpected event. And the best part is, you can share these Live Photos on Instagram.
So, why wait? Start exploring the world of Live Photos today and bring your Instagram posts to life. Your followers will appreciate the extra effort you put into creating engaging, dynamic content. Happy posting!