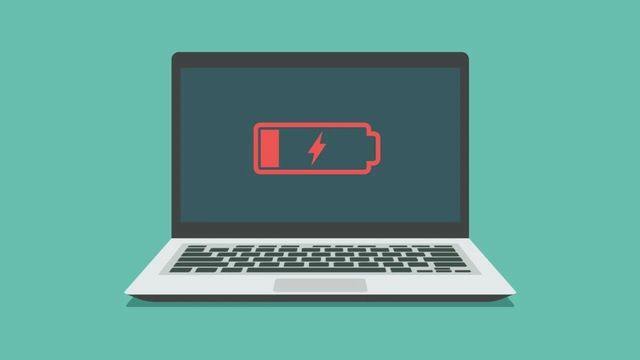
Fix a Laptop That Would Not Charge: Here are some steps you can take to restart the charging process if your laptop is plugged in but not producing any power.
Since you simply cannot use your computer after the battery dies, it is easy to become anxious when your laptop is plugged in but not charging. However, you can usually identify the cause of your laptop’s “plugged in, not charging” error and fix it.
When your laptop battery won’t charge while plugged in, we’ll show you what to do. These recommendations apply to all types of computers, including Dell, Lenovo, HP, and others. Although our focus is on Windows, the majority of the advice also applies to laptops running Linux or macOS.
Fix the Laptop that Would Not Charge
- Remove the Battery and Connect it to the power source.
- Review Your Cable and Ports for Damage
- Check Windows and Manufacturer Power Options
- Get Another Laptop Charger
- Update or Reinstall Battery Drivers
- Reduce Resource Usage
- Make Sure You’re Using the Right Charger and Port
- Check All Physical Cable Connections
Remove the Battery and Connect it to the Power
The next thing you need to check is whether or not your laptop’s battery is functional. Remove the battery entirely from your laptop if it is detachable. Typically, you may accomplish this by tugging on a few tabs on your machine’s bottom. Check the handbook or Google directions for your specific model if you’re unsure of the procedure.
If your computer isn’t already dead, you should always turn it off before removing the battery. Remove the charger and any other connected devices.
After removing the battery, press and hold the power button for a while to discharge any leftover charge in the device. Connect the charger once that is finished, then try turning the laptop on.
Review Your Cable and Ports for Damage
Even though you only gave the power cord a cursory inspection before to look for cable connection problems, you should do it right now. The problem of “plugged in, not charging” may be caused by a damaged cord.
Check the whole length of the power cord for fraying or other damage to your laptop. Grab it and feel for any bulging or other irregularities. Additionally, it’s a good idea to sniff the charger’s AC adapter; if burning is detected, the charger needs to be replaced because anything went wrong within the box. Use caution while using any charger that becomes overheated or emits a burning odor for your safety.
Check out the laptop’s charger port. When you connect the charger, it should fit quite tightly. To determine if you can obtain a good connection, try moving it around a little if it feels loose.
Additionally, look within the port for any obstructions that can inhibit a reliable connection. Check the port with a flashlight for any accumulated dirt or other material that might be preventing the plug from doing its function.
If there is dirt within, carefully clean it out with a cotton swab or toothpick. Avoid being aggressive because doing so could harm the port’s internal components.
Check Windows and Manufacturer Power Options
Your laptop battery may not charge even when plugged in due to other software problems. Although Windows’ power plans don’t specifically include any choices that prohibit your battery from charging, third-party applications can have an impact on how your laptop charges.
Go to Settings > System > Power & Sleep and select Additional power settings on the right side to get the Windows 10 power settings page. If you can’t see it, horizontally extend the Settings window until it shows up.
Click Change Plan settings next to your existing plan on the ensuing window. Although Restore default settings for this plan is the simplest option, you can click Change advanced power settings if you’d like. Check to see if it changes anything.
The aforementioned choices can be found under Settings > System > Power if you are using Windows 11.
The battery charge threshold feature is offered by many laptop manufacturers, and it can change how your computer charges.
If you have a Lenovo laptop, for instance, a certain Lenovo app setting may restrict the battery from charging. To locate Lenovo Vantage (known as Lenovo Settings on previous systems), use the Start menu search function.
Open the app, select Hardware Settings from the panel’s menu, then click Power. Scroll down to find the charge threshold. A minimum and maximum battery percentage for charging can be chosen if the Custom battery charge threshold slider is enabled.
For instance, if you selected Start charging when below 50% and Start charging at >80%, your computer would begin charging when it fell below 50% and stop when it rose over >80%. While doing so can protect the health of your battery, it also prevents your computer from charging as usual.
If this option is activated, try turning it off or choosing a different threshold.
Get Another Laptop Charger
You’ve now exhausted all free options for fixing the “plugged in, not charging” issue. Ordering a new computer charger (or borrowing one from a friend if they happen to have a laptop that utilizes the same charger) and testing it out is the last resort.
Even though you may purchase cheap third-party chargers from Amazon and other stores, we advise using an approved charger whenever possible. The quality of third-party parts is frequently inferior to that of official parts, and using a subpar charger could harm your computer or even start a fire.
Choose a well-reviewed charger replacement from Amazon or a comparable site if buying a real charger is not an option. Make sure the product has positive evaluations, and keep an eye out for phony reviews of other products.
Always check the charger’s rating to see if it matches the power requirements of your laptop before purchasing one. To verify this, consult the manufacturer’s specifications or the specifications on the approved charger.
Update or Reinstall Battery Drivers
Windows utilizes specific drivers to interact with your battery since it is an external device. After attempting the suggestions above, if your computer is still plugged in and not charging, upgrading or deleting those drivers may help.
Select Device Manager from the pop-up menu by performing a right-click on the Start button or by pressing Win + X. You should see two entries if you expand the Batteries section: Microsoft AC Adapter with a Microsoft Control Method Battery that is ACPI-Compliant
Update the driver by performing a right-click on each of these. Although it’s unlikely that this will turn up any updates, it’s still worth a go. Although your computer’s manufacturer generally doesn’t offer a specialized driver for the battery, you can try updating the drivers manually.
If updating doesn’t work, select Uninstall Device from the context menu when you right-click on each battery driver. This will block your computer from communicating with the battery, but don’t worry—the driver will reinstall when you restart. You should restart your computer after removing each battery-related component.
Let Windows reinstall the battery driver after restarting, and maybe the batteries will begin charging once more. If it doesn’t work, try it again, but this time unplug your charger and remove the battery after you’ve shut down and performed the removal. Put everything back in its place after finishing this, then restart your PC.
Reduce Resource Usage
It’s possible that your battery’s failure to charge while being plugged in has nothing to do with the hardware. It’s possible that your charger isn’t replacing the battery rapidly enough if your computer is operating very hard.
For instance, if your computer becomes hot, the fan must operate more vigorously to keep it cool, which consumes more battery power. Numerous power-hungry applications and processes running simultaneously will quickly drain your battery.
To check the current resource consumption on Windows, press Ctrl + Shift + Esc or look for the Task Manager in the Start menu. If more information is needed, click More Details. The number of resources being used can be seen under the Processes tab.
Try closing certain programs if you think this is the cause of your charging issue. In dire situations, you should turn off your computer to allow it to cool. Once it returns to normal, turn the device on and check to see if your charger can keep up with the battery under a typical load.
If your computer consistently has trouble keeping up with your regular workflow, you should, whenever possible, think about upgrading to a more powerful machine. Make sure you are not blocking your laptop’s vents, which could cause it to overheat.
Make Sure You’re Using the Right Charger and Port
Next, you should make sure that your laptop is receiving power (and enough of it).
Make sure your charger is connected to the appropriate port on your laptop. Many laptops only have one charging port; however, if you have a more recent computer, it might charge via USB-C.
Try each USB-C connector on your laptop in this situation, as some may only be for data transfer. On some PCs, the charging connector will have a small power icon next to it.
Use the original charger that came with your laptop for the best results. Fake chargers have the potential to permanently destroy your battery. The incorrect wattage may be used by third-party models, which can cause your laptop to charge very slowly or not at all. This is particularly true for USB-C cables, as some of them weren’t designed to charge things like laptops.
Also, take into account the power supply that your computer is connected to. Your laptop might not draw enough power to charge the battery if it is plugged into a battery pack, a low-power socket on an airline, or something similar. In these circumstances, the poor power supply may allow you to maintain the battery level while preventing a rise in charge.
Check All Physical Cable Connections
Check the fundamentals first before diving further into this charging issue’s troubleshooting. Ensure that the charging wire is securely placed into the laptop’s charging port.
Double-check its connection to the wall outlet after that; if the current socket isn’t working, try a different one. Try plugging straight into a wall outlet if you’re currently hooked into a power strip.
Don’t forget to check the cable’s connection to the AC adapter brick as well. That might have come loose as a result of stretching over time or being stepped over.
Make sure you’re not experiencing a different problem, like an erroneous battery % in Windows 10.
- Do I Have A Laptop When it is too Late?
- How to Fix WiFi Connection Problem in Laptop
- How to Fix Black Screen on Laptop Windows 10
- Complete Guide on Lenovo Ideapad 330-15 AMD
Conclusion
We’ll show you what to do if the laptop battery won’t charge when it’s plugged in. Even though Windows is our primary focus, most of the tips are also applicable to laptops running Linux or Apple’s macOS. Before plugging in your laptop, inspect the entire length of the power cord for fraying or other damage. Due to additional software issues, a laptop battery may not charge even while plugged in. Although there are no options in Windows‘ power plans that directly prevent your battery from charging, third-party programs can affect how your laptop charges. If purchasing a genuine charger is not an option, pick a well-reviewed charger replacement from Amazon or a site of a similar nature.
People Also Ask
Why is my laptop not charging, even though it’s plugged in?
A bad motherboard harms charging circuits, and broken battery sensors are common offenders. An experienced tech support agent will have seen all of the problems that could arise with your specific make and model of laptop.
How do I force my laptop to charge?
If your laptop battery is detachable, remove it and then reinstall it. If the laptop won’t turn on when you try to switch it on, remove the battery once more and hold down the power button for 10 seconds to drain any leftover power. Then, connect your charging cord and check to see if your device starts to charge.
Can I use a laptop without a battery?
If you consider a few factors, there is no reason a laptop couldn’t function quite fine without its battery. To begin with, confirm that you are using the laptop’s original power adapter.