- How To Capture Screen On Windows?
- Use Snipping Tool to capture screenshots
- Open Snipping Tool
How To Capture Screen On Windows? Windows users who wish to take screenshots of their desktop, programs, or documents will be happy to learn that Microsoft has introduced a helpful tool that allows you to take screenshots of your desktop, clipboard, or a specified folder using shortcuts.
After the October 2018 update, the Snip tool for Windows was added to Windows 10, and all you have to do to utilize it is hit the print screen button on your keyboard, which is labeled “PrtScn.”
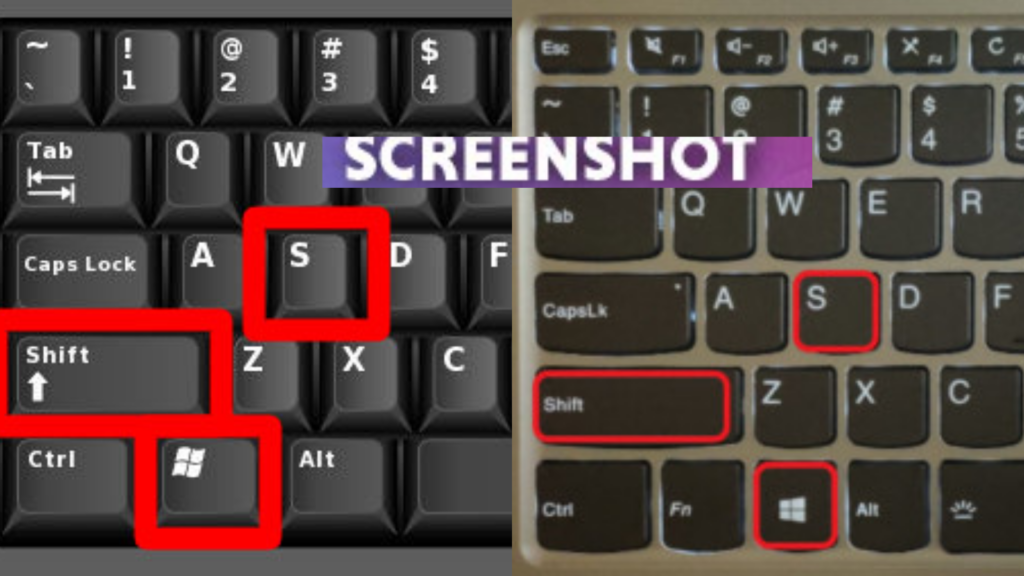
On older Windows PCs, you can quickly take a screenshot by pressing the Windows key + Shift + S keys, which will open the screenshot toolbar on machines that don’t have the 2018 update installed. Your screen will darken and a little menu will appear in the top center when you press the “PrtScn” button on your Windows desktop or laptop keyboard.
If your keyboard does not have a print screen button, you may always reach it by pressing Windows + Shift + S on earlier Windows systems. It’s also worth noting that on some laptops, you might need to hit the “Function” key on your keyboard together with “PrtScn” to activate the Snip & Sketch tool.
How To Capture Screen On Windows?
The Snip & Sketch menu consists of four primary feature icons on the right-hand side, as well as a “X” that allows you to exit the Window screen snipping tool and return to your desktop or open application.
The toolbar’s first icon from the left is for taking rectangular screenshots, and it allows you to rapidly create a rectangle box around the area you want to record.
A cross hair will appear in place of your cursor icon, and you may choose a portion of your screen by clicking and holding the left mouse button while dragging the cursor across the area you want to screenshot. Let go of the mouse button whenever you’re satisfied with your choices.
Selecting a free-form shape
If you’d rather capture a more free-form shape, the second icon from the left allows you to use your mouse to draw an irregular shape. The snapshot will then be saved to your clipboard, making it simple to paste into a document or editing app for additional manipulation, or save as a separate file.
Capturing an application window
If you’re working in a Windows app and want to capture the app Window and its contents, the third icon from the left lets you effortlessly grab a clean Window’s frame with all of the app’s contents. If you’re distributing instructive documents or want to record the whole program frame, including menus, for sharing, this is a good option.
Read Also: Top 10 Kali Linux Tools For Hacking
Full desktop screenshot
Finally, the fourth icon from the left lets you capture your full desktop and take a screenshot without needing to use your mouse to make rectangles. The screenshot will be saved to your clipboard once more for easy access in your favorite application or for pasting into the paper you’re working on.
If you don’t have access to a print screen button on your keyboard and are using a Windows tablet, 2-in-1 convertible PC, or similar device, you can take a screenshot by holding both Power and Volume Down buttons simultaneously.
Whenever you hit both keys at the very same time, a snapshot of the full screen is saved to your clipboard, which you may paste into other documents or open in programs for editing.
Use Snipping Tool to capture screenshots
Screenshot of your Computer monitor to copy images and words from all or part of it. Make adjustments or notes with the Snipping Tool, then save and share.
Any of the following snips can be captured:
Freestyle snip– Surround an object with a free-form shape.
Cut rectangle– To make a rectangle, move the pointer around an object.
Snipping a window– Select the window you want to capture, such as a dialog box.
Full-screen screenshot– The entire screen should be captured.
A snip is automatically copied to the Snipping Tool window, where you may make adjustments, save, and share it.
Open Snipping Tool
For Windows 10
- Select Start, type snipping tool into the search box, and then select Snipping Tool from the results.
- Hold down the Windows logo key while pressing Shift + S.
For Windows 8.1 or Windows RT 8.1
Swipe in from the right edge of the screen, select Search, type snipping tool into the search bar, and then choose Snipping Tool from the results list.
For Windows 7
Start by typing snipping tool into the search box, then selecting Snipping Tool from the list of results.
Conclusion
If the current Snip & Sketch screenshot application is not already installed on your Windows PC, you may get it for free from the official Microsoft Windows App Store. The software is small and won’t take up much space once installed, but it offers a convenient way to take screenshots of your desktop or applications, which is ideal for capturing data as photographs that you can share quickly and effortlessly.
Windows 10 version 17763.0 or higher, Xbox, Windows 10 version 22000.0 or higher are the minimum system requirements for installing the Microsoft Snip & Sketch screenshot program.
People May Ask?
Q- What is the shortcut for taking screenshots on the keyboard?
A- To take a screenshot on your desktop or laptop, use the Print Screen button on your keyboard. You can also use the CTRL + Print Screen shortcut to snap a screenshot. A full-screen screenshot is taken by Windows and saved to the clipboard. After that, paste the image from the clipboard into a program like Paint.
Q- On a computer, how do you take a screenshot and where does it go?
A- Alternatively, use the Windows key + Print Screen key [windows key print screen] to capture the complete screen and save it as a snapshot. To signal that you’ve taken a screenshot, your screen will briefly dim. The screenshot will be saved to the Pictures > Screenshots folder automatically.
Q- Why am I unable to locate my screenshots in Windows 10?
A- Select This PC from the File Explorer menu. After you’ve selected This PC, go to the Pictures folder. Find the Screenshots folder in the Pictures folder. You should be able to see your screenshots there.
Q- Where is my Screenshots folder?
A- The icon for this file app can be found in your taskbar or Start menu. Go to the folder where you wish to save your screenshots. Since “This PC > Pictures > Screenshots” is the normal place, consider transferring them to “This PC > Documents > Screenshots.”
Q- Why aren’t my screenshots being saved to the screenshot folder?
A- The Print screen key just copies the current screen to the clipboard. Holding down the Windows key while pressing the Print Screen key opens File Explorer/Pictures/Screenshots.