How to install macos via USB

Want to install macos via USB? This alternative method of installing macOS will be demonstrated for you.
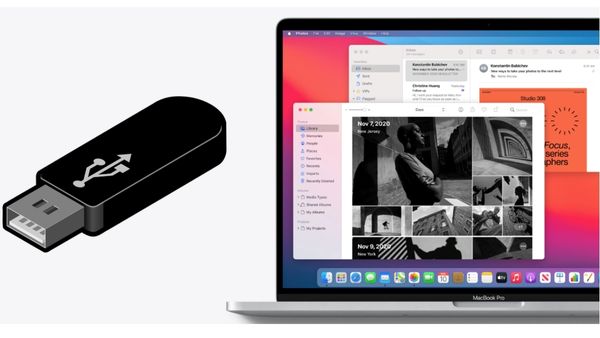
The internet recovery method is the simplest approach to perform a clean installation of macOS if you ever experience Mac problems. However, did you know that if internet recovery isn’t an option, you may also make a bootable USB drive to install macOS from? This makes installing on many machines simple and enables you to boot your Mac from a different source if it won’t operate normally.
Why Would You Need to Install macOS From a USB?
Although it takes a little longer than just updating macOS from the Software Update section of the System Preferences, creating a bootable USB device and using it to reinstall macOS offers advantages.
However, you can install or update macOS on numerous devices without downloading the installer on each Mac by making a bootable USB stick. Given that the installer size of the most current editions of macOS is 12GB, this can save a significant amount of time.
The built-in recovery tools included with the macOS installer can also be used to troubleshoot and resolve various problems. These problems include those where your Mac won’t start up or where you have to restore system files that appear to have been lost.
The ability to execute a clean installation is another advantage of installing macOS from a bootable disc. You can remove unnecessary apps and data that may have collected over time by doing a clean installation. Since macOS has a fresh start thanks to a clean install, this nearly always leads to a quicker Mac.
Step 1: Select a USB Flash Drive for macOS Installation
You won’t have to spend much on this task because USB flash drives are more affordable than before. However, be sure to purchase a name-brand flash drive from a dependable retailer (such as SanDisk, Kingston, or PNY). Avoid purchasing inexpensive discs from websites like eBay with suspiciously large storage capacities.
Those drives frequently have their firmware hacked to provide your operating system a misleading size report. The transfer speeds won’t just be agonisingly slow; employing them could also result in data loss or even harm to the USB port.
Additionally, check the ports on your Mac. The majority of Apple’s current MacBook models only have USB-C connections available. Thankfully, a lot of USB-C drives are readily available, or you can buy a USB-C to USB-A adaptor.
Choose a USB 3.0 disc with a minimum capacity of 16GB if at all possible. The Samsung BAR Plus offers good value overall; for other options, we’ve compiled a list of all the quickest USB 3.0 drives available.
Step 2. Format Your USB Flash Drive
Only a Mac can produce a bootable installer for macOS. Make sure to back up any vital files if you’re using a flash drive that already has data on it because you’re about to destroy everything.
Step 3. Download the macOS Installer
Versions of the macOS operating system can now be downloaded via a new approach introduced by Apple. Newer versions (macOS Mojave and later) update the system from System Preferences instead of the App Store, where the installers were previously accessible for download.
Open System Preferences and select Software Update to get the most recent macOS installer to install on a USB drive. Here, you should be able to download the installer.
To access System Preferences and get the update, you can also utilise the App Store. Search for your version of macOS on the App Store. To download the installer, open System Preferences by clicking the View or Get option. You can still get the installer from the App Store if you’re using a previous version of macOS than Mojave.
Step 4: Use Terminal to Create a Bootable USB
The simplest approach to make a bootable USB device for installing macOS is through Terminal. Simply substitute the name you specified your drive in the Disk Utility step above for MyVolume in the commands below.
Be aware that the commands for making bootable USBs for various macOS versions vary slightly. Use the command below exactly as is to make a bootable disc for macOS Monterey. If not, substitute the name of the macOS version for Monterey (for example Mojave).
A Monterey installer is made by:
sudo /Applications/Install\ macOS\Monterey.app/Contents/Resources/createinstallmedia –volume /Volumes/MyVolume
The command you require is above. Copy it, paste it into your Terminal window, and then press the Return key. After entering your password, hit Return to confirm that you want to wipe the USB drive. Your bootable USB device will now be created by Terminal and erased, ready for you to boot from.
Software for Making a Bootable Disk
Utilize third-party programmes to create a bootable drive if you prefer to use software to do so. The renowned tool for making bootable discs, Diskmaker X, is no longer supported by the most recent versions of macOS (High Sierra onwards). Instead, you can create a bootable macOS installer using the free Install Disk Creator from MacDaddy.
Simply launch the app after downloading it. The macOS installation should be immediately found by the app in your Downloads folder. Simply choose the USB drive from the top volume dropdown list on which you wish to make a bootable disc, and then click Create Installer.
How to Use a USB Drive to Start Your Mac
You now have a fix if you get stuck in a circumstance where your Mac won’t boot or you wish to install macOS from scratch. You don’t need to download the macOS installer again because you can install macOS from your USB. The “macOS could not be installed” problem can be resolved using this.
Make sure you have a backup of all your crucial data before you reinstall macOS on your Mac! As it will wipe your hard drive, this is essential when performing a fresh installation. The data on your Mac may be readily backed up with Time Machine.
Depending on the type of CPU your Mac has, there are two distinct ways to boot it from a bootable USB.
Intel Macs
Simply insert your newly formed USB drive into a Mac with an available USB port. Turn on the computer, or restart it if it’s already on, and as soon as the boot process begins, hit and hold the Option key.
Apple Silicon Macs M1 or M2
Turn on the machine, or restart it if it’s currently on, then hold down the Power button to start an M1 or M2 Apple silicon Mac from a bootable USB disc.
The option to choose your USB drive as a startup disc should now be available. When you choose it, your computer will boot from your USB drive into macOS Recovery and display the installer for macOS Monterey on your screen. Quit the installer and launch Disk Utility from the Recovery menu if you want to first wipe your disc in order to perform a clean install. You can format the drive before installing macOS Monterey from the Recovery menu.
The option to choose your USB drive as a startup disc should now be available. When you choose it, your computer will boot from your USB drive into macOS Recovery and display the installer for macOS Monterey on your screen. Quit the installer and launch Disk Utility from the Recovery menu if you want to first wipe your disc in order to perform a clean install. You can format the drive before installing macOS Monterey from the Recovery menu.
Currently, certain wireless keyboards might not function. If you’re having trouble, connect a wired keyboard. Try a different USB port if you don’t see your USB drive listed among the launch possibilities.
What to Do if a USB Can’t Get Your Mac to Boot
In some instances, you might not be able to launch a macOS installer from an external drive on Intel Macs with a T2 processor (Intel Macs released after 2018). This is because a Security Startup Utility configuration needs to be changed. You can accomplish this by taking the actions listed below:
By holding down Cmd and R while turning on the Mac, you can enter macOS Recovery.
Users will be listed in a list. Select the administrator’s account, then sign in.
Pick Startup Security Utility from the Utilities menu after the Mac has booted up.
- You might be prompted to authenticate once more. Enter the administrator account password and the macOS password.
- When the app has started, go to the External Boot area at the bottom of the window and choose the option to Allow booting from external media.
- Restart the Mac after closing the app.
Using the procedures outlined above, you ought to be able to boot properly from the external disc at this point.
- Tips and Tricks for New macOS Ventura System Settings
- Snapchat Finally Debuts on the Microsoft Store
- How to Download Google One VPN on Windows And Mac
Using Your Mac OS USB Bootable
From the macOS Recovery screen, you can create a new installation of macOS, recover data from a Time Machine backup, or access utilities like Disk Utility. Additionally, you can update macOS to the most recent version using your USB device. This USB stick might come in handy if you need to debug your Mac without a network connection.


