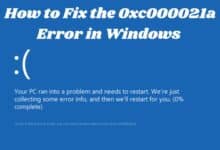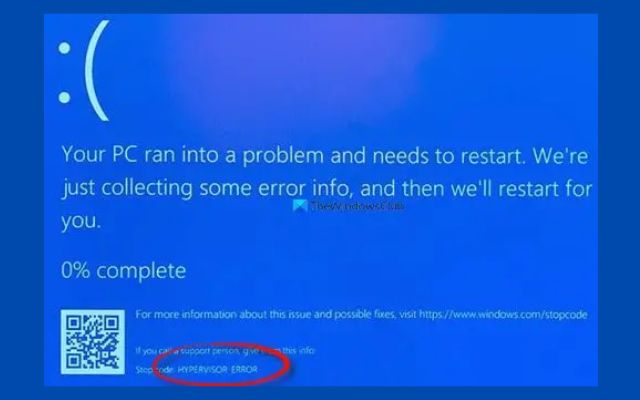
Here are Ways to Fix the HYPERVISOR_ERROR Blue Screen on Windows 10 & 11- The HYPERVISOR_ERROR blue screen is a critical error that can occur on Windows 10 and 11, indicating a problem with the virtualization technology of the operating system.
This error can cause the system to freeze or crash, making it difficult to work on the computer. However, there are several ways to resolve this issue, including disabling Hyper-V, updating drivers, performing a clean boot, performing a system restore, or reinstalling Windows.
In this article, we will go over each of these methods in detail to help you fix the HYPERVISOR_ERROR blue screen on your Windows 10 or 11 system.
Fix the HYPERVISOR_ERROR Blue Screen on Windows 10 & 11
Disable Hyper-V
If you have the Hyper-V feature enabled, try disabling it and see if it resolves the issue.
Update Drivers
Make sure your system drivers are up-to-date, particularly the display and storage drivers.
Perform a clean boot
Start Windows with a minimal set of drivers and startup programs to eliminate any software conflicts that might cause the error.
Perform a system restore
If the issue started after a Windows update or software installation, restore the system to a previous state when it was working fine.
Reinstall Windows
If none of the above steps work, consider a clean reinstall of Windows. Back up your data before proceeding.
How to Disable Hyper-V
To disable Hyper-V on Windows 10 or 11, follow these steps:
- Open the Control Panel and go to Programs and Features.
- Click on Turn Windows features on or off.
- Find Hyper-V in the list and uncheck the box next to it.
- Click OK and follow the on-screen instructions to complete the process.
- Restart your computer for the changes to take effect.
Note: If you are using Hyper-V for virtualization, disabling it may affect your virtual machines. Consider disabling it temporarily and re-enabling it later if needed.
How to Update Drivers
There are two ways to update drivers on Windows 10 or 11: manually and automatically.
Manually updating drivers
- Go to the manufacturer’s website and search for the latest driver for your device.
- Download and install the driver.
- Restart your computer for the changes to take effect.
Automatically updating drivers
Use Windows Update: Go to Settings > Update & Security > Windows Update and click on Check for updates. Windows will automatically download and install the available updates, including driver updates.
Use a driver updater tool
There are many third-party driver updater tools available that can scan your system, identify outdated drivers, and install the latest versions with just a few clicks.
Perform a Clean Boot
To perform a clean boot on Windows 10 or 11, follow these steps:
- Press the Windows key + R to open the Run dialog box.
- Type msconfig and press Enter to open the System Configuration utility.
- Go to the Services tab and check the box next to Hide all Microsoft services.
- Click Disable All.
- Go to the Startup tab and click Open Task Manager.
- In the Task Manager, select each item in the Startup tab and click Disable.
- Close the Task Manager and click OK in the System Configuration utility.
- Restart your computer and see if the issue is resolved.
Note: After you have completed the troubleshooting, you can follow these steps to undo the changes and return to a normal startup.
Go back to the System Configuration utility, select the General tab, and click Normal Startup. Restart your computer and see if the issue is resolved.
How to Perform a System Restore
To perform a system restore on Windows 10 or 11, follow these steps:
- Press the Windows key + X and select Control Panel.
- Go to System and Security > Backup and Restore (Windows 7).
- Click on Restore system files and settings.
- Select a restore point that was created before the issue occurred and click Next.
- Follow the on-screen instructions to complete the restore process.
- Restart your computer for the changes to take effect.
Note: System restore will revert your system settings to an earlier state, and any software installed after the selected restore point will be removed. Make sure you have a backup of important data before proceeding.
How to Reinstall Windows
To reinstall Windows, follow these steps:
Backup important data
Make sure to back up any important data on your computer, as reinstalling Windows will erase all data from the system drive.
Backing up important data in Windows involves a few steps:
Data Backup Tips for Windows:
- Sign in with a Microsoft Account:
- This account is linked to Windows, Microsoft 365, OneDrive, Xbox, and more.
- Backed-up information is stored with your Microsoft account, making access on a new PC as easy as signing in.
- Back-Up Your Folders:
- Utilize Windows Backup for all your backup needs.
- Your free Microsoft account includes 5 GB of OneDrive cloud storage.
- Sync specified folders to your OneDrive account, providing instant access on all computers associated with your Microsoft account.
- Back-Up Your Settings:
- Windows Backup can safeguard various settings, including installed apps, Wi-Fi network details, language preferences, and wallpaper settings.
- Use Third-Party Tools:
- Explore diverse methods for data backup, such as external drives or remote server uploads over the Internet.
- Choose between integrated Windows tools or opt for third-party backup solutions.
Remember, regular backups are crucial to prevent data loss. Always ensure important data exists in two or more physical locations simultaneously. Stay safe! 😊
- How to fix file system errors on Windows 10
- How to Fix Common Blue Screen of Death Issues: Tips and Tricks
Obtain Windows installation media
You can either purchase a Windows installation disk or download an ISO image from Microsoft’s website.
Boot from the installation media
Insert the installation disk into the CD/DVD drive or USB port and restart your computer. Change the boot order in your BIOS/UEFI settings to boot from the installation media.
Select “Install Now”: On the Windows setup screen, select “Install Now”.
Accept the license terms
Read and accept the license terms to proceed with the installation. No one is going to ready such as long terms and conditions therefore you can generally check the terms and conditions box and proceed.
Custom or Upgrade installation
Select “Custom” installation if you want to perform a clean install, or “Upgrade” to keep your data and installed programs intact.
Choose a disk partition: Choose a disk partition to install Windows. If you are performing a clean install, you will need to create a new partition or format the existing one.
Wait for the installation to complete:
Wait for the installation process to complete, which may take several minutes to an hour, depending on your computer’s specifications.
Configure Windows
After the installation is complete, you will need to configure Windows with your settings, such as the language, region, keyboard layout, and other preferences.
Note: You may need to enter a product key during the installation process. Make sure to have it handy, or purchase one if needed.
- How to fix GPU Slowdown Issue Caused by Discord Update
- How to Fix sound or audio problems in Windows
Conclusion
The HYPERVISOR_ERROR blue screen is a critical error that can occur on Windows 10 and 11. To fix this issue, you can try disabling Hyper-V, updating drivers, performing a clean boot, performing a system restore, or reinstalling Windows.
If none of these methods work, consider seeking assistance from a professional technician or Microsoft support. It’s important to keep your system updated and to regularly back up your data to prevent data loss in case of such errors.
Frequently Asked Questions (FAQ)
Q: What is the HYPERVISOR_ERROR Blue Screen Error?
The HYPERVISOR_ERROR stop code indicates an issue with the Hypervisor virtualization software within Windows 10 and 11, particularly with the Windows Hypervisor Platform (Hyper-V).
What is the difference between Hyper-V and VirtualBox?
| Aspect | Hyper-V | VirtualBox |
|---|---|---|
| Hypervisor Type | Type 1 (Bare Metal) | Type 2 (Hosted) |
| Supported Host OS | Windows only | Windows, Linux, macOS, Solaris |
| Supported Guest OS | Windows, Linux, FreeBSD | Windows, Linux, FreeBSD, Solaris, macOS, Others |
| Performance | Better performance, strong MS integration | Greater compatibility with various OS |
| User-Friendliness | Integrated with Windows (Pro, Education) | Simpler setup, includes VM creation wizard |
| Features | Advanced features like clustering, balancing | Features like shared folders, drag & drop |