You can use BlueStacks to run Android apps on Windows and enjoy a seamless mobile experience on your PC. Want to use your favorite Android apps on your Windows computer? BlueStacks makes it possible! BlueStacks is a handy program that lets you run Android apps on your PC. Whether you want to play games, use social media, or be productive, this article will guide you through the simple steps to use BlueStacks and enjoy Android apps on your Windows PC.
How to Use BlueStacks to Run Android Apps on Windows
Step 1: Download and Install BlueStacks
- Go to the official BlueStacks website (www.bluestacks.com) using your web browser.
- Press on the “Download BlueStacks” button.
- Once the download finishes, find the installation file and double-click on it.
- Follow the steps on the screen to install BlueStacks.
Step 2: Set up BlueStacks
- After the installation, open BlueStacks from your desktop or the Start menu.
- You’ll see a welcome screen where you need to sign in with your Google account. If you don’t have one, you can create it for free.
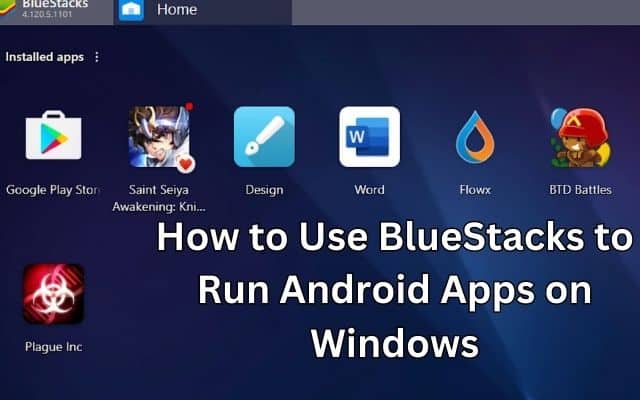
- Once you sign in, the BlueStacks home screen, which looks like an Android device, will appear.
Step 3: Install Android Apps
- To install an Android app, click on the “Google Play Store” icon on the BlueStacks home screen.
- In the Play Store, you can search for the app you want or browse different categories.
- When you find the app you want, click on the “Install” button.
- BlueStacks will download and install the app on your virtual Android device.
Step 4: Launch and Use Android Apps
- After the app installation is complete, you can launch it from the BlueStacks home screen or the “My Apps” tab.
- BlueStacks lets you use your mouse and keyboard to interact with the app, just like a touchscreen. It’s easy!
- Enjoy using your Android apps on the bigger screen of your Windows PC through BlueStacks.
Step 5: Customize BlueStacks Settings (Optional)
- BlueStacks allows you to customize settings for a better experience. To access the settings, click on the gear icon at the top-right corner of the BlueStacks window.
- In the settings menu, you can adjust things like display resolution, RAM allocation, and CPU usage to optimize performance.
- You can also sync BlueStacks with your Android device for easy file and app transfer.
FAQ about How to Use BlueStacks to Run Android Apps on Windows
Q: What is BlueStacks?
BlueStacks is an emulator that allows you to run Android apps on your Windows computer. It creates a virtual Android device on your PC, enabling you to enjoy a wide range of Android apps on a larger screen.
Q: Can I use BlueStacks without a Google account?
No, you need a Google account to use BlueStacks. During the setup process, you will be prompted to sign in with your Google account. If you don’t have one, you can create a new account for free.
Q: How do I install Android apps using BlueStacks?
To install Android apps using BlueStacks, follow these steps:
- Go to BlueStacks and click on the “Google Play Store” icon on the home screen.
- In the Play Store, you can search for apps using the search bar or browse through different categories.
- Once you find the app you want to install, click on the “Install” button.
- BlueStacks will download and install the app on your virtual Android device.
Q: How do I launch and use Android apps on BlueStacks?
After installing an app, you can launch and use it on BlueStacks by following these steps:
- Go to the BlueStacks home screen or the “My Apps” tab.
- Find the app you want to use and click on its icon.
- BlueStacks allows you to interact with the app using your mouse and keyboard, simulating touchscreen gestures.
Q: Can I customize BlueStacks settings?
Yes, you can customize BlueStacks settings to optimize your experience. To access the settings, click on the gear icon located at the top-right corner of the BlueStacks window. From there, you can adjust display resolution, allocate more RAM, manage CPU usage, and more.
Q: Is BlueStacks compatible with Mac computers?
Yes, BlueStacks is compatible with both Windows and Mac computers. You can download the appropriate version from the official BlueStacks website and follow the installation steps accordingly.
Q: Is BlueStacks safe to use?
Yes, BlueStacks is considered safe to use. It is a well-established software that has been used by millions of users worldwide. However, it’s always recommended to download BlueStacks from the official website to ensure you’re getting a legitimate and secure version.
Q: Can I transfer files between BlueStacks and my Android device?
Yes, BlueStacks allows you to synchronize your installation with your Android device. This enables you to transfer files, apps, and other data seamlessly between BlueStacks and your Android device.
- How to make shortcuts on Your iPhone
- How to Set Up And Use Face ID to Secure Your iPhone or iPad
- How to Unblock a Number on iPhone or iPad
Conclusion:
Now you know how to use BlueStacks to run Android apps on your Windows PC! Just follow these easy steps: download and install BlueStacks, set it up with your Google account, install your favorite apps, and enjoy using them on the bigger screen of your PC. BlueStacks makes it simple to experience the world of Android apps right on your Windows computer.